This article is primarily written as a note to self so that I can refer to this years later if the need arises.
Also, this ain’t a tutorial on OpenGL or Gradle. I’m an expert at neither. I’m just documenting what worked for me.
This article assumes you have some familiarity with OpenGL.
There are excellent resources for learning more about both of these, such as the OpenGL Wiki for OpenGL, and official Gradle tutorials for Gradle.
If you haven’t done so before, please go through the following from the official Gradle tutorials:
Back Story
As part of my graduate class on computer graphics, I’ve been making multiple OpenGL projects lately. I use C++ for it.
I was relying on a Makefile that I had manually written for my builds. But this approach scaled poorly as I added more header files and stuff.
I considered giving cmake a go (I do have a little prior experience with cmake), but the official tutorial wasn’t very inviting. And on the flip side, Gradle’s documentation seemed nice. I know I shouldn’t judge a book by its cover…
Setting Up Gradle
We will do this step-by-step:
- Initialize a repo with the gradle stuff
- Create a simple OpenGL program
- Create
build.gradle - Compile and run this OpenGL program
Note that I use Linux.
1. Initialize Repo
Once you are in the directory where you want to build your OpenGL project in, do:
$ gradle wrapper

BUILD SUCCESSFUL in 1s
1 actionable task: 1 executed
$ tree
.
├── gradle
│   └── wrapper
│       ├── gradle-wrapper.jar
│       └── gradle-wrapper.properties
├── gradlew
└── gradlew.bat

2 directories, 4 files
$
(The second command tree is not strictly necessary; I ran it just to show you how the directory structure is supposed to look like).
This would intialize a gradle directory structure, and will autogenerate some files. For now, don’t worry about what any of those files are.
2. Create a simple OpenGL program
Our program would just draw a box on the screen. Nothing fancy.
We would have a file main.cpp, that calls a function defined in another file (therefore a header file is also involved). I have chosen to store all header files and their associated .cpp files in a directory called “myutils”. In this example, we will call those header and source files draw.hpp and draw.cpp.
Create a new .cpp file in src/main/cpp/main.cpp. It is imperative that your directory structure is exactly that due to reasons that will be clear later (we would eventually tell gradle to go look for the program at this specific location). From your project root, run:
$ mkdir -p src/main/cpp/myutil/
$ touch src/main/cpp/main.cpp
$ touch src/main/cpp/myutil/draw.cpp
$ touch src/main/cpp/myutil/draw.hpp
$ tree
.
├── build.gradle
├── gradle
│   └── wrapper
│       ├── gradle-wrapper.jar
│       └── gradle-wrapper.properties
├── gradlew
├── gradlew.bat
└── src
    └── main
        └── cpp
            ├── main.cpp
            └── myutil
                ├── draw.cpp
                └── draw.hpp

6 directories, 8 files
We have now created three empty files:
- main.cpp
- myutil/draw.cpp
- myutil/draw.hpp
Now that we have our files, let’s populate it with contents. In main.cpp, type in the following:
|
|
This OpenGL program draws a box on the screen. I’ve made it as barebones as I can. The actual drawing, however, is done by drawSquare() function (line 9) which we have not yet defined.
Speaking of which, drawSquare() would be defined in draw.cpp (line 4 #includes its header file). Let’s do that now. In myutil/draw.hpp, write:
|
|
That declares the drawSquare() function. Let’s define that function in myutil/draw.cpp:
|
|
The code inside drawSquare() should be self-explanatory if you already know OpenGL.
3. Create a simple build.gradle
Now that we have the source code for the OpenGL program, we just need to tell gradle how to use those.
From your project root directory, create a new file build.gradle, and populate it with the following:
|
|
- Line 1 tells gradle that this is a C++ project
- Line 5 tells gradle our main program would be called “main”
- Line 11 specifies the compiler flags
- Line 12 specifies the linker flags
4. Compile and run our project
To compile our project, from the project root:
$ ./gradlew mainExecutable
Starting a Gradle Daemon (subsequent builds will be faster)

BUILD SUCCESSFUL in 6s
2 actionable tasks: 2 up-to-date
$
Running tree now would show you where all your files are:
$ tree
.
├── build
│   ├── exe
│   │   └── main
│   │       └── main
│   ├── objs
│   │   └── main
│   │       └── mainCpp
│   │           ├── 3dibsw59g7ec3s1btlr0m4b6e
│   │           │   └── draw.o
│   │           ├── 5v08dtn7cszvzrlgdayn1y9u6
│   │           │   └── main.o
│   │           └── 9u45fklcllnwm8tb6ofgq9bqb
│   │               └── draw.o
│   └── tmp
│       ├── compileMainExecutableMainCpp
│       │   ├── options.txt
│       │   └── output.txt
│       └── linkMainExecutable
│           ├── options.txt
│           └── output.txt
├── build.gradle
├── gradle
│   └── wrapper
│       ├── gradle-wrapper.jar
│       └── gradle-wrapper.properties
├── gradlew
├── gradlew.bat
└── src
    └── main
        └── cpp
            ├── main.cpp
            └── myutil
                ├── draw.cpp
                └── draw.hpp

18 directories, 16 files- The executable was stored at
build/exe/main/ - The other highlighted files are the ones we worked with in this article
- If anything goes wrong during compilation, inspect
build/tmp/compileMainExecutableMainCpp/output.txt - If anything goes wrong during linking, inspect
build/tmp/linkMainExecutable/output.txt
To actually run our program, run our executable:
$ ./build/exe/main/main
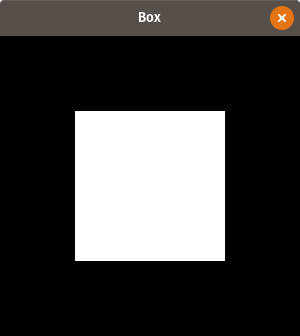
If all goes well, you should see a box like the one below:

OpenGL Box
What did we gain?
Fair question. Here are some of the advantages I gained:
- It is now easier to share the OpenGL with other people and make it work on their machines.
- If you decide to make additional header and source files to store your code in you could just make those files and #include them into your other files as appropriate, and compile and run. (Previously when I was working with manual makefiles, I also had to change my
Makefile).
This entire project is on my GitHub repo here.